What is listmonk?
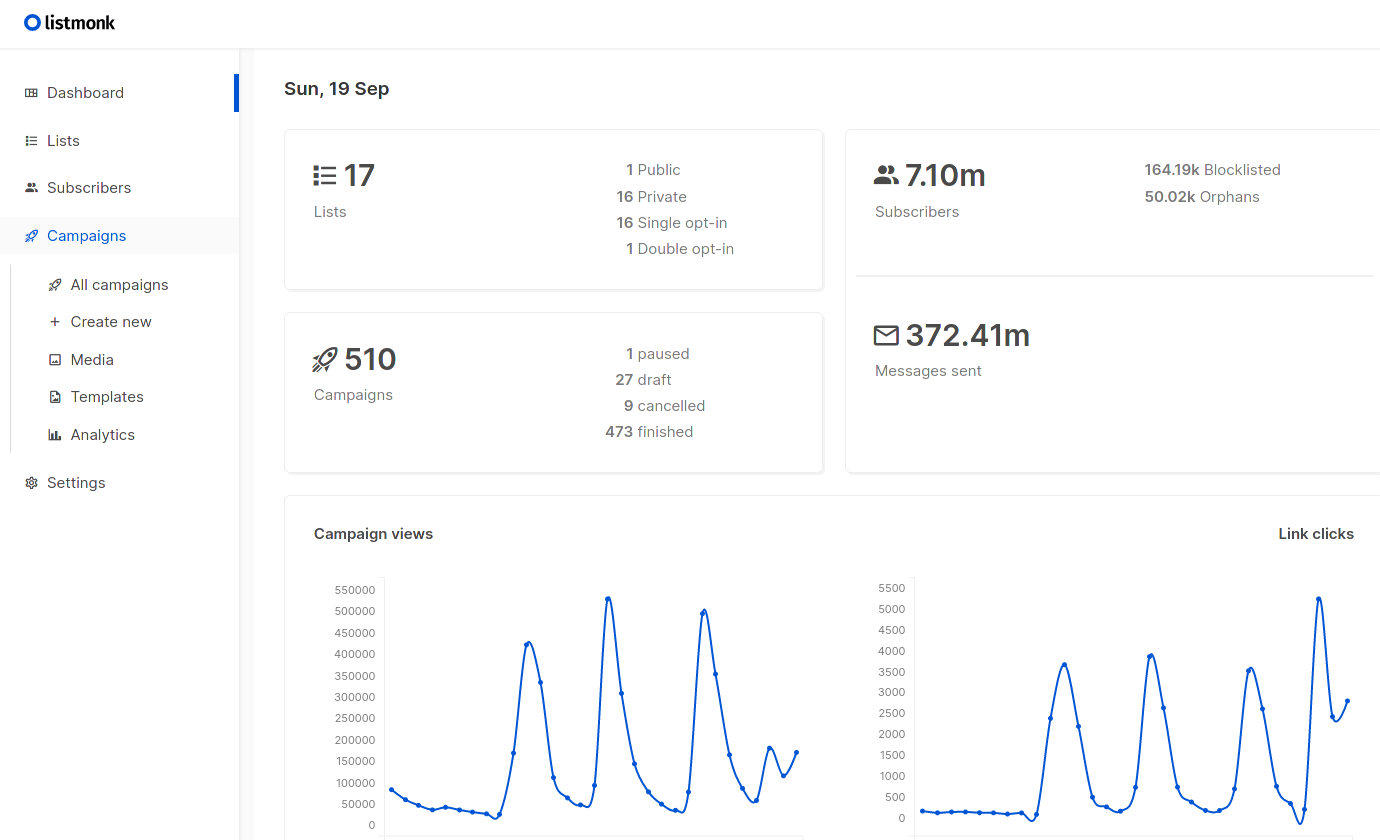
Listmonk is a selfhosted newsletter and mailing list manager. It is free and opensource, so you have full control over your data. It also offers a super clean webui:
Why choose listmonk over mailchimp, buttodown etc
For me, running a newsletter means owning my email list.
When people create newsletters they want to break free from the big platforms like Twitter or YouTube. When you use a proprietary service like Mailchimp, you’re still tied down to their rules and limitations. With Listmonk, you get more control and independence, which for me is a huge win.
The other reason is that listmonk is completely free (if you don’t count electricity bills/vps hosting bills). Even if you include the cost of your email host + hosting fees it is still tiny compared to mailchimp or buttondown.
Listmonk feature overview
- Analytics - Tracking email opens, link clicks and bounces
- Templates - Advanced html templates with template variables
- Public subscription page - See mine here
- Subscribers import - Import subscribers from other platforms using CSV.
- Media Uploads - Upload images etc
- Email lists - Separate lists eg Weekly roundup and new posts.
And more
Requirements for running listmonk
- A server running linux, either in the cloud or at home. We will be using debian 12, but you can use any other distribution.
- An email address to send the newsletter from. Can either be a gmail or a custom one.
Server Setup
Before doing anything I highly recommend that you disable password logins for ssh. See Securing ssh with Key-Based authentication for more info on how to do that.
Login to your server via ssh
ssh user@server.ip
Make sure that all packages are up to date
sudo apt update && sudo apt upgrade
You will also have to have docker installed, if you don’t install it, instructions for debian
Create a new directory to host listmonk’s configuration files
mkdir listmonk && cd listmonk
Download the listmonk docker-compose file
curl -O https://github.com/knadh/listmonk/blob/master/docker-compose.yml
Run it using docker:
docker compose up -d
Now if you head to
localhost:9000
You should see listmonk up and running
But first we should change some settings in the configuration files
vim config.toml
Here you can change the default admin password. I also changed the address to 0.0.0.0 so that I can access it via the servers ip.
Listmonk customization
Now head to the webui at
localhost:9000
Login and head to the settings
In the General tab you can customize the default from email, root url, site name, favicon and admin notification emails
Here’s what my settings look like:
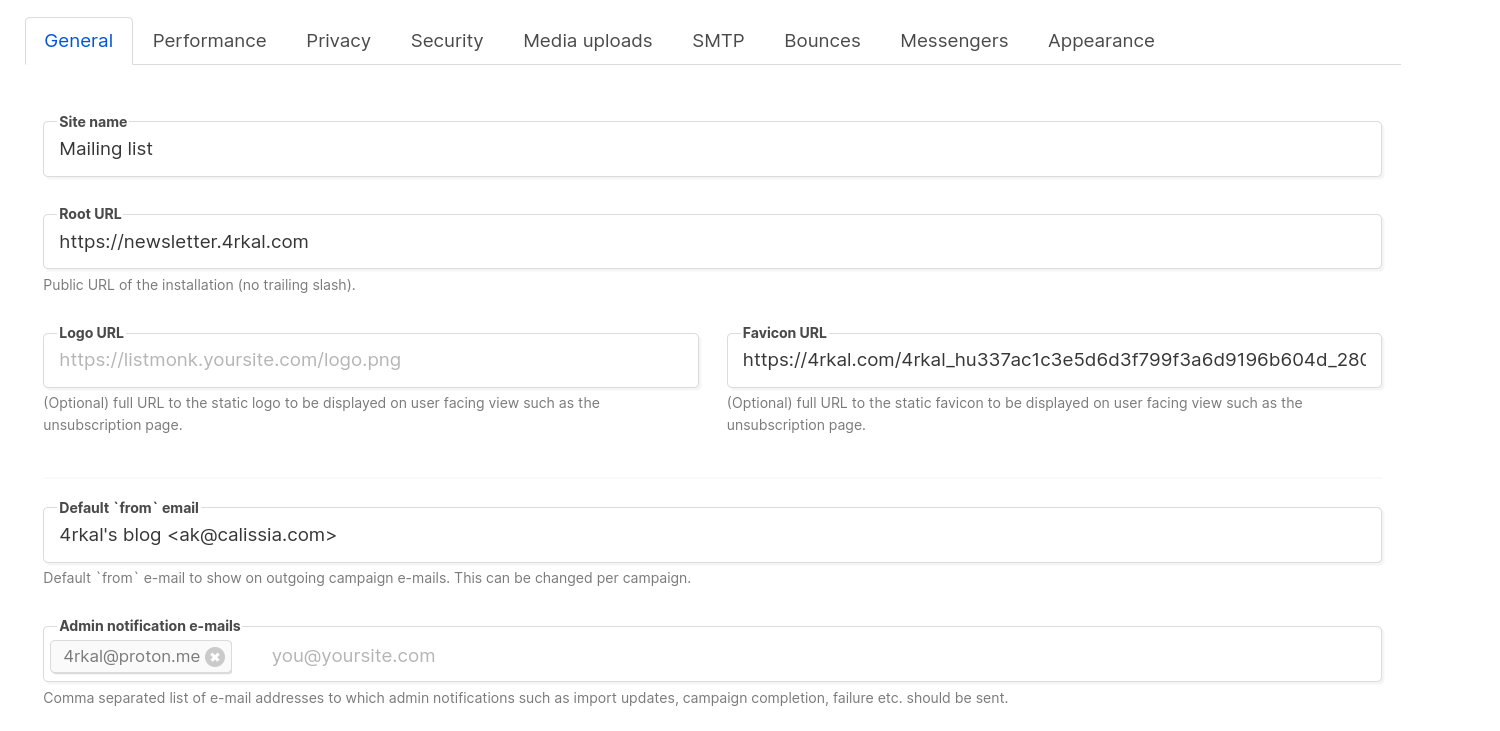
You can customize the page to your liking.
Save by clicking on the save button in the top right corner.
Email setup
For the next part you will either need a gmail account or any other email provider that give you smtp connection
If you want a great custom email I recommend ionos, you can get up to 10$ in credits by using my link Ionos - Email & Office 10$ credits that is the provider that I am currently using.
In this guide I will show you how to set this up for these two providers, but the setup should be similar for others too.
IMPORTANT: Both of these hosts have a limit on how many emails can be sent out per hour or per day. For ionos that is 500/hour. Setting up a Sliding Window Limit is very important.
Setup for gmail
I recommend that you use a different gmail account from your personal one.
The first thing you will have to do is generate an app password, to do that head to Create and manage app passwords and create a new one called listmonk. Copy the password that is generated and save it somewhere safe.
Now head over to the listmonk webui
In the SMTP tab in settings you will find this:
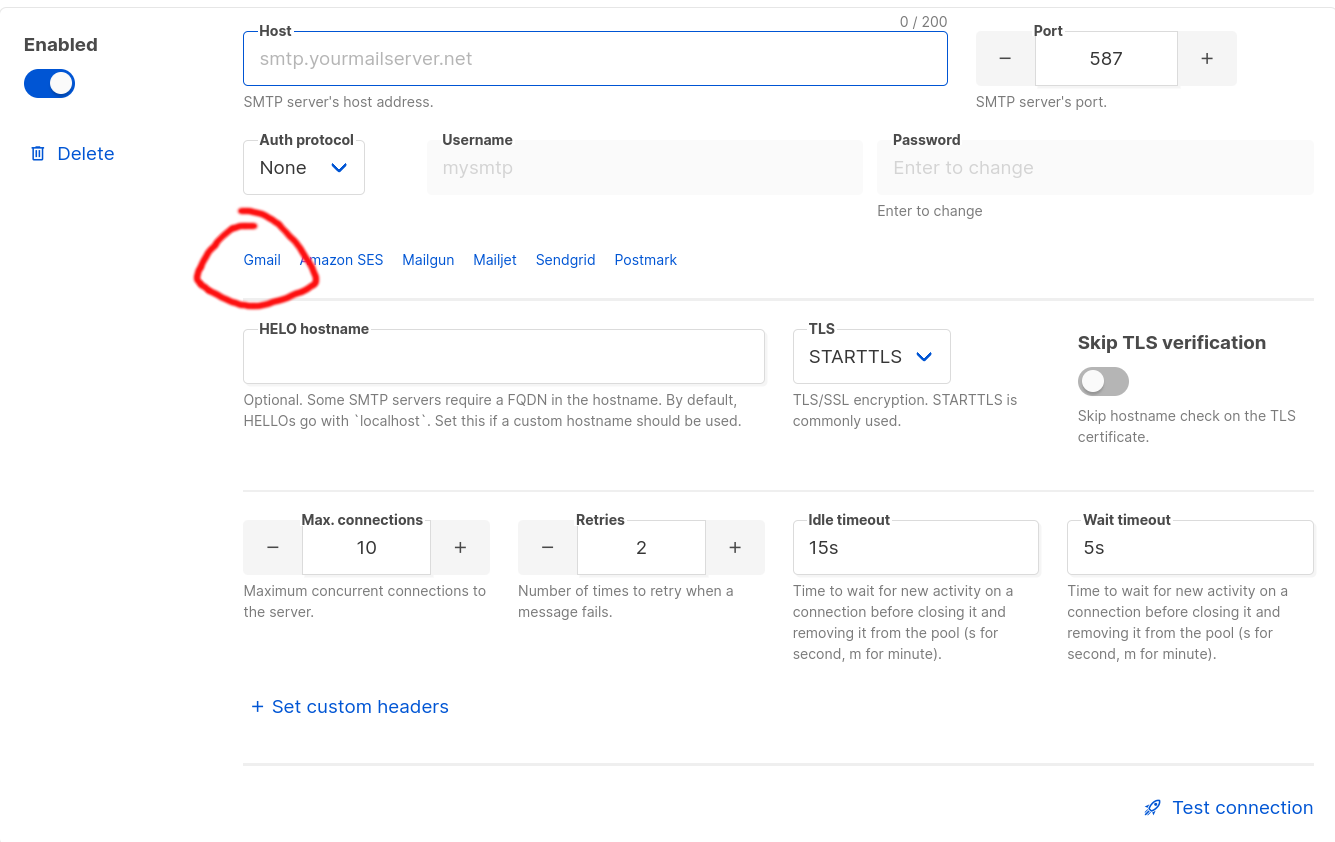
Click on the gmail option as circled.
Now enter your full email address (including @gmail.com) in the username field
And in the password field enter the app password we generated before.
Now click on the Test connection button in the bottom right corner, enter a test email and click on Send e-mail.
If you configured everything correctly you should now get a test message to the email specified.
Don’t forget to save!
Setup for ionos
You should probably generate a new email for the newsletter, eg `newsletter@yourdomain.tld.
Head over to the listmonk webui
Now in the SMTP tab in the settings you see this
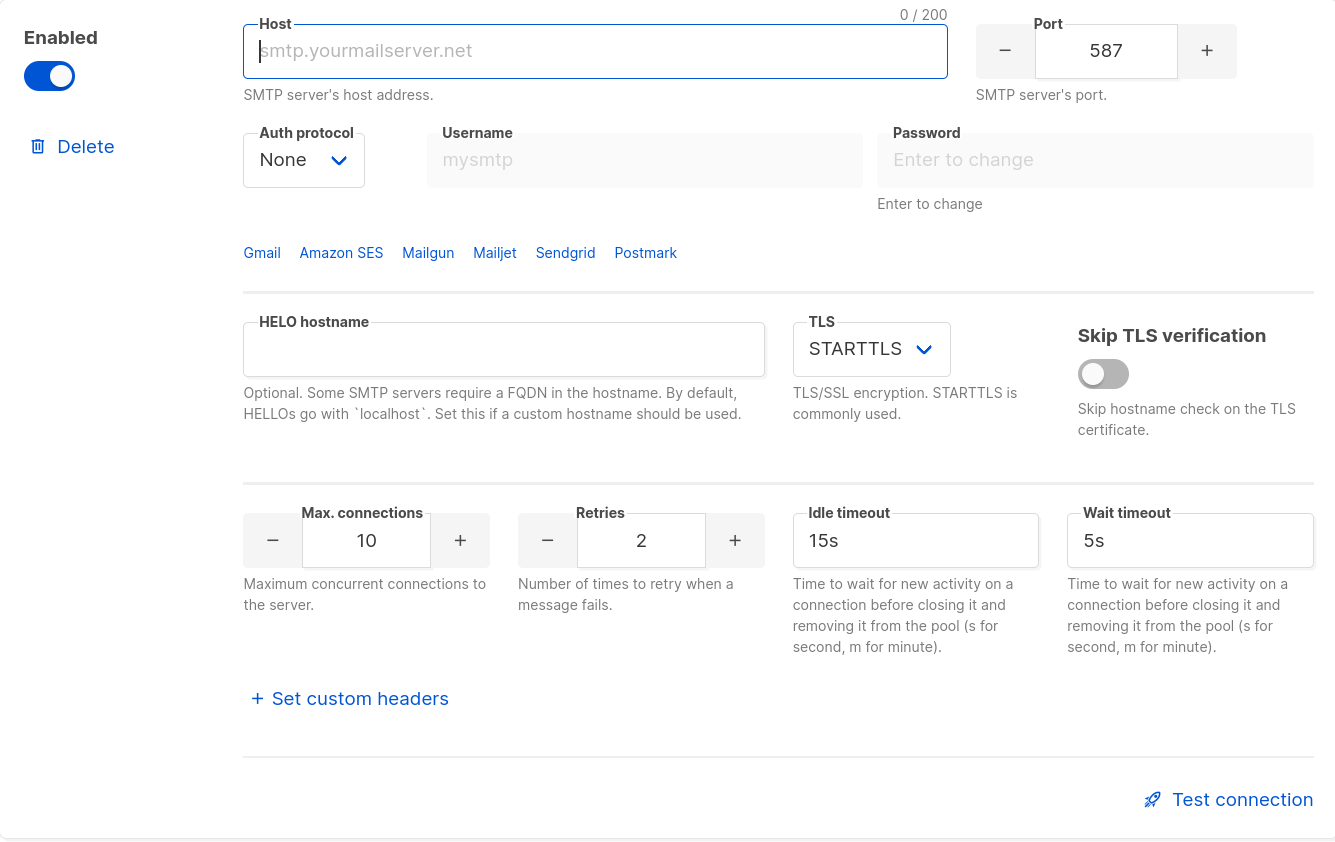
The ionos smtp server settings are:
Host: smtp.ionos.com
Port: 465
TLS: SSL/TLS
IMPORTANT: If you’re using IONOS UK or another specific regional version, you need to adjust the host name. For example, if you’re on IONOS UK, you should use smtp.ionos.co.uk instead of the global smtp.ionos.com.
Now in the username field you should enter the full email address newsletter@yourdomain.tld and the password is the normal user password.
Now to test the connection click on the Test connection button in the bottom right corner, enter a test email and click on Send e-mail.
If you configured everything correctly you should now get a test message to the email specified.
Don’t forget to save!
Sliding window limit
This is very important to setup when email providers limit the amount of email to be sent per hour or per day. You can access the Sliding window limit in Settings under the performance tab. For ionos I have it set at 500 emails/hour
Exposing via cloudflare tunnels
I will be making my instance publicly accessible using cloudflare tunnels.
To do this you will need a cloudflare account and a domain pointed to cloudflare.
First head to the Zero Trust Dashboard
Under Networks click on Tunnels and then Create a tunnel
Once created you should Install and run a connector, follow the instructions on the page for your specific setup.
After the connector is running you should click on the Public Hostname tab and Add a public hostname.
Now you should see something like this:
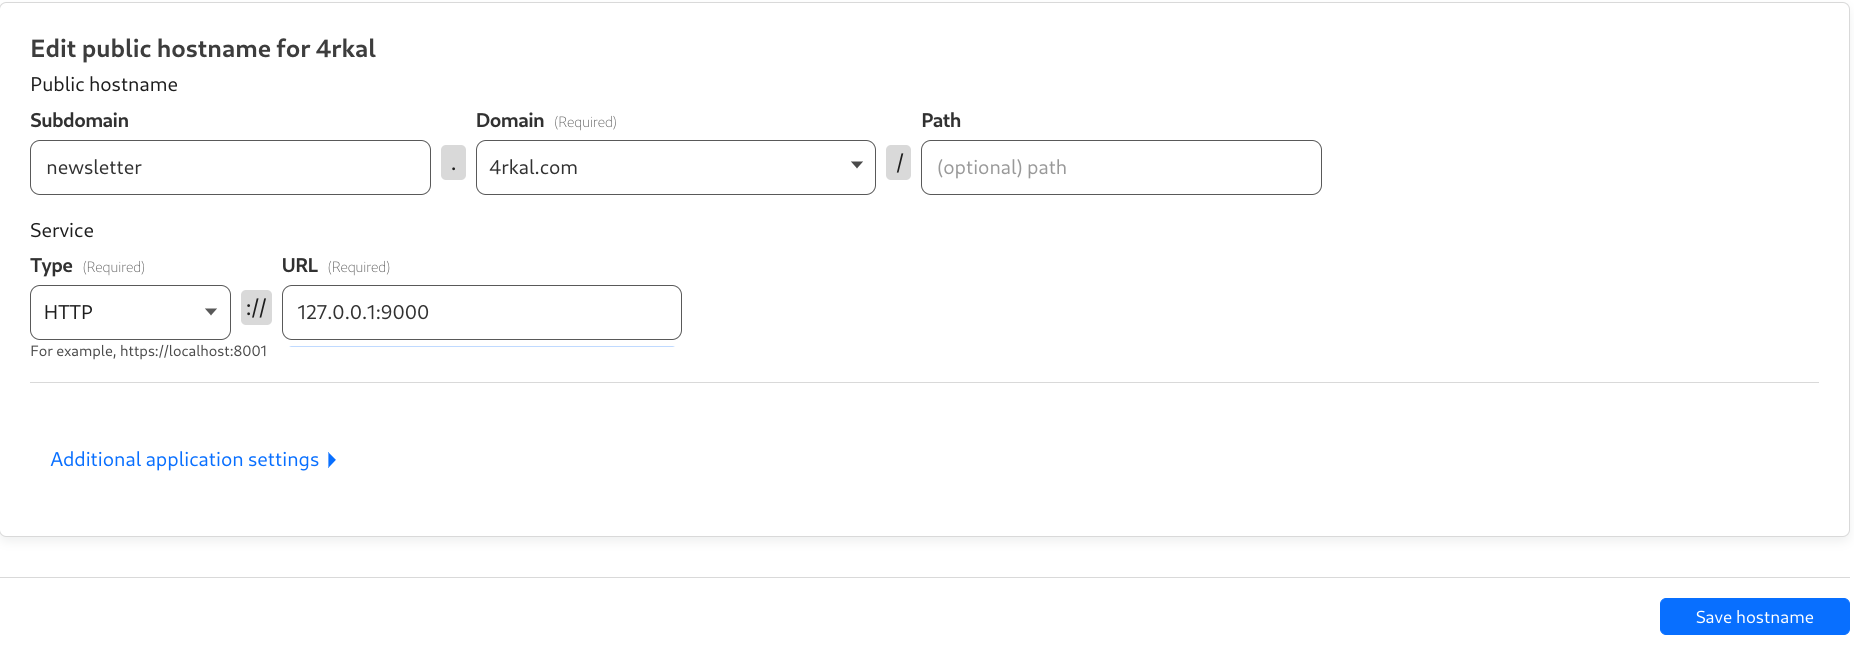
Fill in the info as I have.
The service type should be HTTP and the url should be yourserverurl:9000, in my case that’s 127.0.0.1:9000
Now if you head to the domain that you specified you should see gitea up and running.
In my case you can access my newsletter page here
Listmonk feature overview
These are all of the features that listmonk offers:
Templates
Listmonk offers amazing built in template support.
All templates are written in HTML.
You can access the templates by going to Campaigns > Templates.
Don’t forget to always include {{ template "content" . }} (for the main content) and also an unsubscribe button in all of your templates
Campaigns
You can create a new campaign (email) by going to Campaigns > All Campaigns
Here you can select a campaign name, subject the list’s you want to target and the template
Email lists
You can create new lists by going to Lists > All Lists.
For example I have two lists:
- New posts - Receive an email every time I post something new on my blog
- Weekly Roundup - Join my weekly roundup, where I share what I’ve been up to that week, including articles I’ve published, cool finds, tips and tricks and more!
Not everyone wants to receive an email every time I post a new article, so I created two lists!
HTML Forms
Listmonk also offers embeddable html forms, to subscribe to the email list. You can access the form builder by going to Lists > Forms
Public subscription page
Except for the HTML forms listmonk also has a public subscription page. For example here is mine.
It can also be accessed under `Lists > Forms
Campaign analytics
You can track the views, clicks and bounces of your email campaigns by going to Campaigns > Analytics.
Import subscribers
You can import subscribers from other platforms by going to Subscribers > Import. It currently supports CSV or ZIP files.
These are the most important features that listmonk offers (I’m sure I forgot some).
That’s all folks
If this article helped you out, consider joining my (listmonk) newsletter bellow: