In this article I’ll walk you through how you can run your own gitea instance. But first
What is gitea?
Gitea is a painless selfhosted Git service. It is written in Go and is extremely lightweight. I run a gitea instance on my Le Potato and it barely uses any resources.
Why use gitea (vs GitHub, GitLab etc)
I started running my own Gitea instance because I wanted a private place to host my Obsidian notes. I did not want to have them in a private GitHub repository since it’s not on my own hardware. GitLab is harder to spin up and has a lot of features that I do not need.
If you want an easy to spin up, private git service gitea is your way to go.
Setup
In this guide I will be using debian 12. The setup should be the same on any other distribution since we will be using docker.
Installing and setting up docker
The first thing you will need is docker installed on your system.
Also make sure to add your user to the docker group. This will allow you to run docker commands without sudo.
usermod -aG docker $USER
Now reboot
Docker-compose.yml
Once docker is installed. We have to get gitea up and running
First create a new directory. This will host our docker-compose file.
mkdir gitea
Then create/edit docker-compose.yml in your favourite text editor.
vim docker-compose.yml
Then paste the following content:
version: "3"

networks:
  gitea:
    external: false

services:
  server:
    image: gitea/gitea:latest
    container_name: gitea
    environment:
      - USER_UID=1000
      - USER_GID=1000
    restart: always
    networks:
      - gitea
    volumes:
      - ./gitea:/data
      - /etc/timezone:/etc/timezone:ro
      - /etc/localtime:/etc/localtime:ro
    ports:
      - "3000:3000"
      - "222:22"
You can change any of the default ports eg switching 3000 to 8000 can be done like this:
ports:
- "8080:3000"
You can setup gitea using a PostgreSQL or MySQL database. But at least for my needs a simple SQLite3 database is more than enough.
Since I want my repositories to still exist even if the container is deleted I will use named volumes. The configuration file with named volumes should look something like this:
version: "3"

networks:
  gitea:
    external: false

volumes:
  gitea:
    driver: local

services:
  server:
    image: gitea/gitea:latest
    container_name: gitea
    restart: always
    networks:
      - gitea
    volumes:
      - gitea:/data
      - /etc/timezone:/etc/timezone:ro
      - /etc/localtime:/etc/localtime:ro
    ports:
      - "3000:3000"
      - "222:22"
Starting the container and additional configuration
Now you can start the container by typing:
docker compose up -d
The -d flag will run it in detach mode. If you want to see the logs live you can remove it.
After docker is done pulling, gitea should be up and running.
Now open up:
localhost:3000 or yourserverip:3000
And you should see something like this:
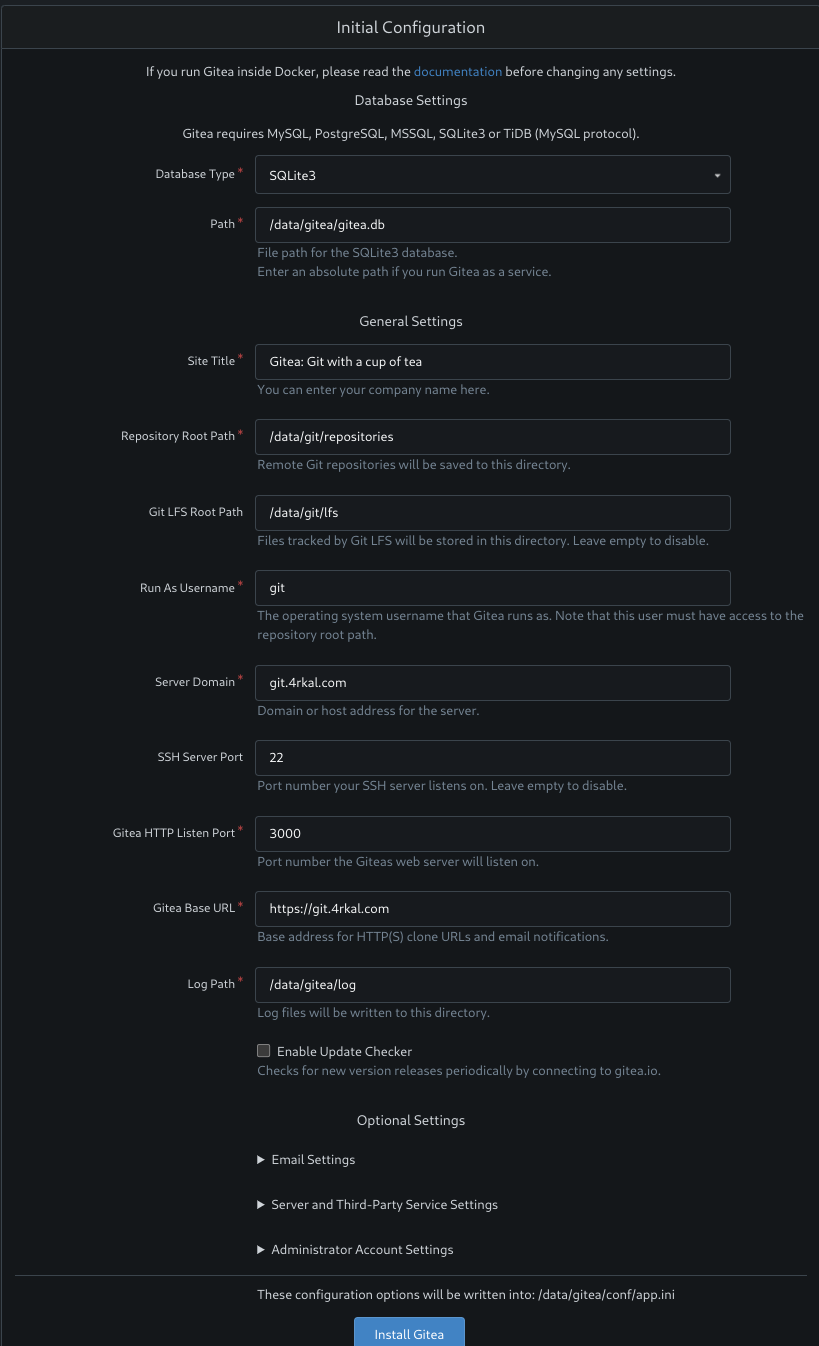
Fill in all of the required information. Since I will be using my subdomain git.4rkal.com I set the server domain and gitea base url to that.
Here you will also have the option to enable sending emails for email verification and notifications. I will be enabling that by using a free (shitposting) email from cock.li.
After you have entered all the required info click on Install Gitea.
After the installation is complete you should be up and running
Make publicly accessible with cloudflare tunnels (optional)
I will be making my instance publicly accessible using cloudflare tunnels.
To do this you will need a cloudflare account and a domain pointed to cloudflare.
First head to the Zero Trust Dashboard
Under Networks click on Tunnels and then Create a tunnel
Once created you should Install and run a connector, follow the instructions on the page for your specific setup.
After the connector is running you should click on the Public Hostname tab and Add a public hostname.
Now you should see something like this:
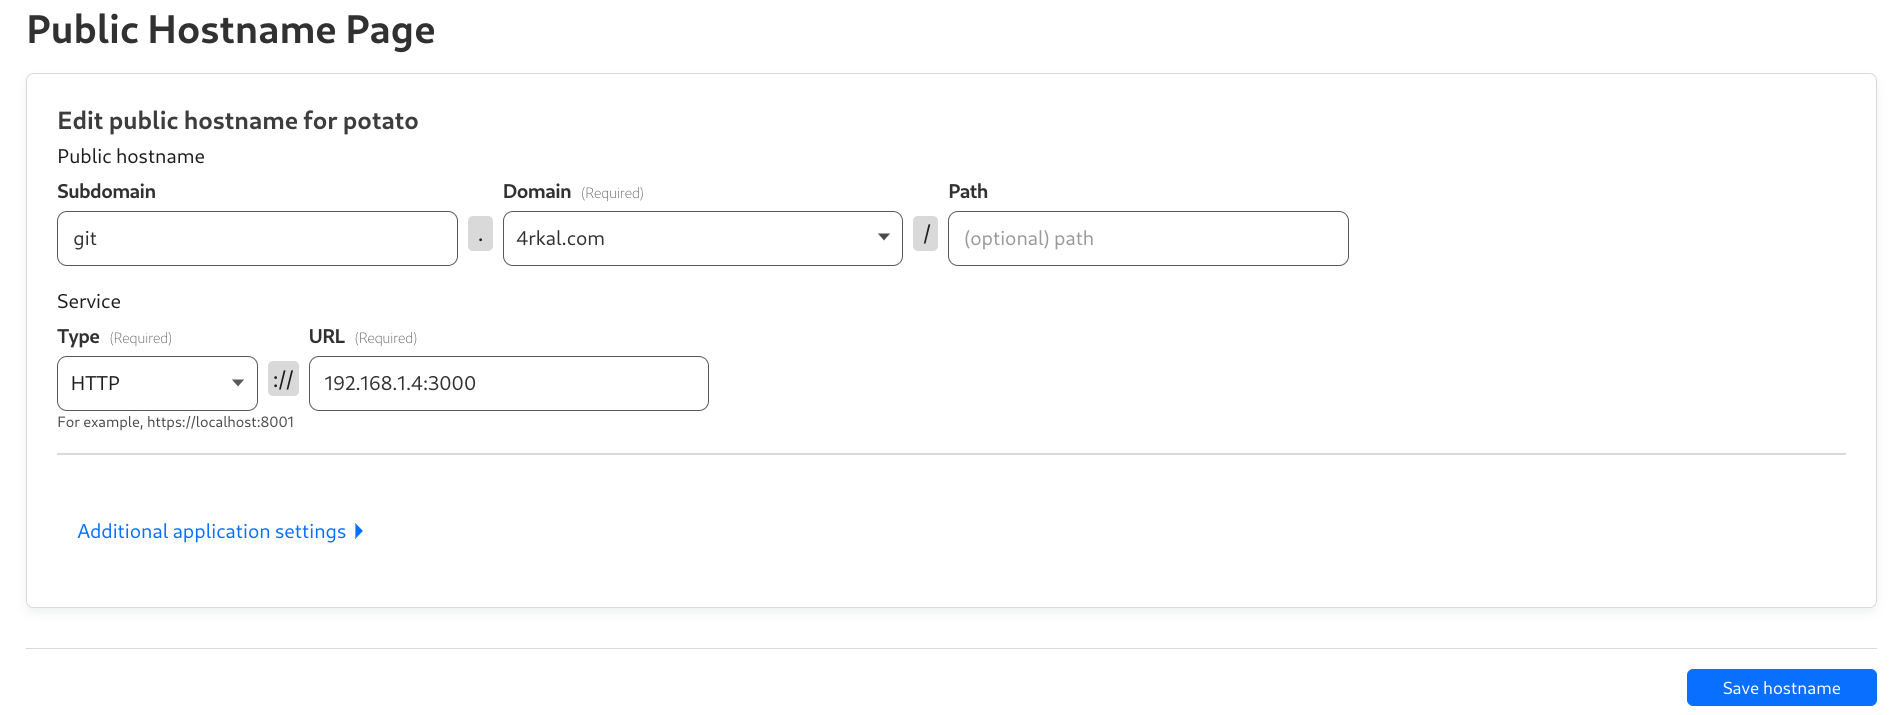
Fill in the info as I have.
You can create a new subdomain eg git or gitea
The service type should be HTTP and the url should be yourserverurl:3000
Now if you head to the domain that you specified you should see gitea up and running.
In my case you can access my public gitea instance at git.4rkal.com
Congratulations, you now have your very own gitea instance!
If you enjoyed this article, consider supporting me